
Image Comparison Views
Kaleidoscope helps you to find the changes between images. It does that in part by offering four different modes that are each designed to bring out the many different kinds of changes that are possible in image files.
You can switch between these views by using one of the following methods:
Use the View menu to choose between Two Up, One Up, Split or Difference.
Choose between Two Up, One Up, Split or Difference in the top toolbar
Hint: Note the keyboard shortcuts ⌘1, ⌘2, ⌘3, and ⌘4 that allow for very quick switching between those views.
Two Up
Two images shown side-by-side in the Two-Up view is the initial default view in Kaleidoscope.
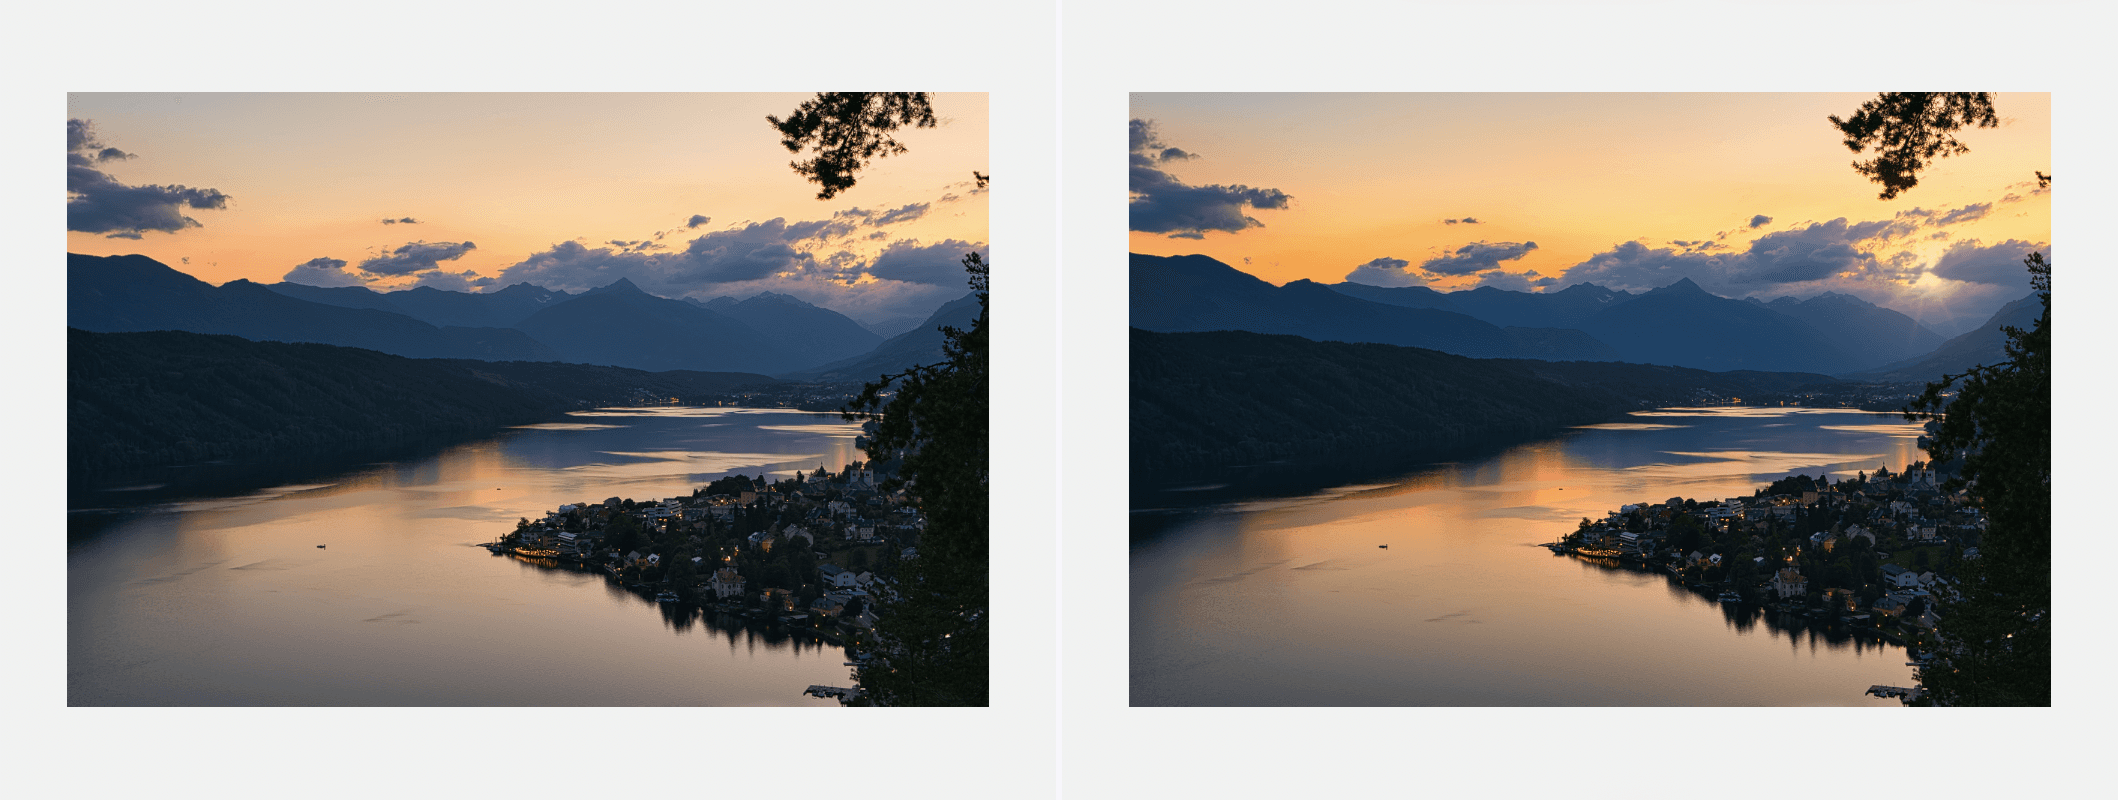
The Two Up view displays the images you are comparing side-by-side, splitting the viewing area in two. You can change the orientation of the split to be either vertical or horizontal.
Use the two buttons in the bottom toolbar or the commands Split Vertical / Split Horizontal from the View menu.
This view is very useful for getting an overview and spotting obvious changes between two images.
One Up
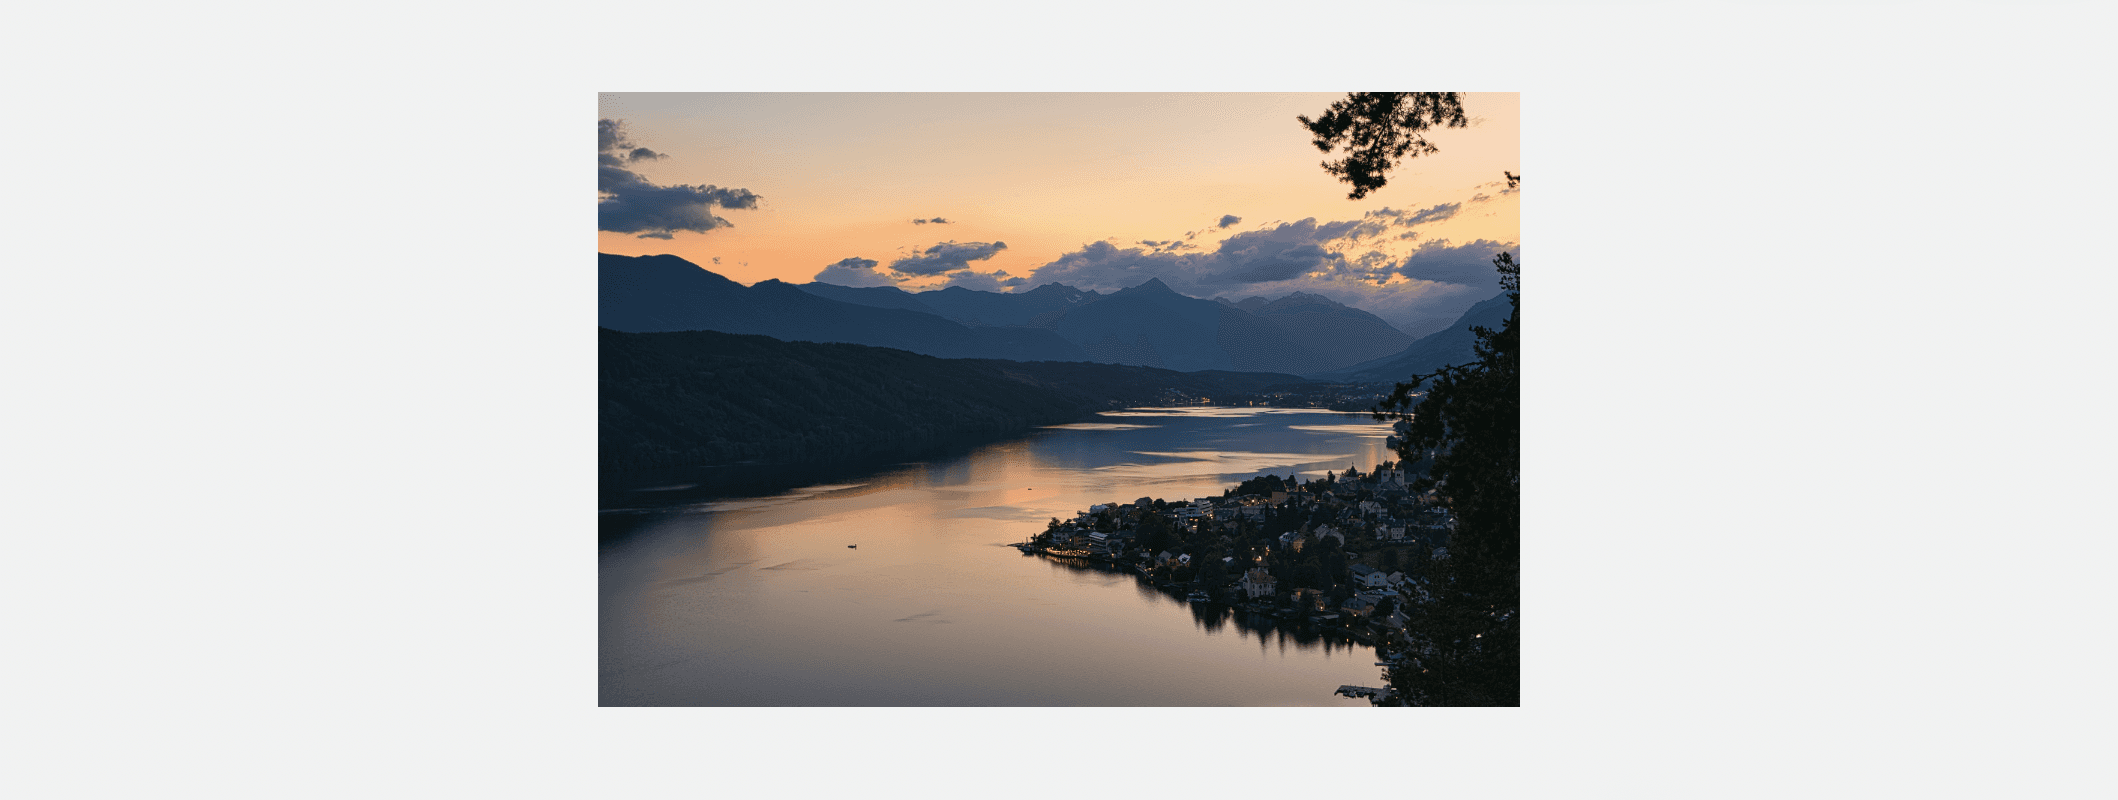
The One Up view shows a single image at a time. You can select which image you want to view using the A/B selector in the bottom toolbar or Show A / Show B commands in the View menu (also use ⌘► and ⌘◄ keyboard shortcuts).
To keep alternating between A and B, you can turn on automatic switching using the Play/Pause control in the bottom toolbar. Select the interval of the animation with the pop-up button next to the Play/Pause button. Like above, there are menu command equivalents for all functions.
This mode, combined with automatic switching, makes even small changes in image files pop out immediately.
Split
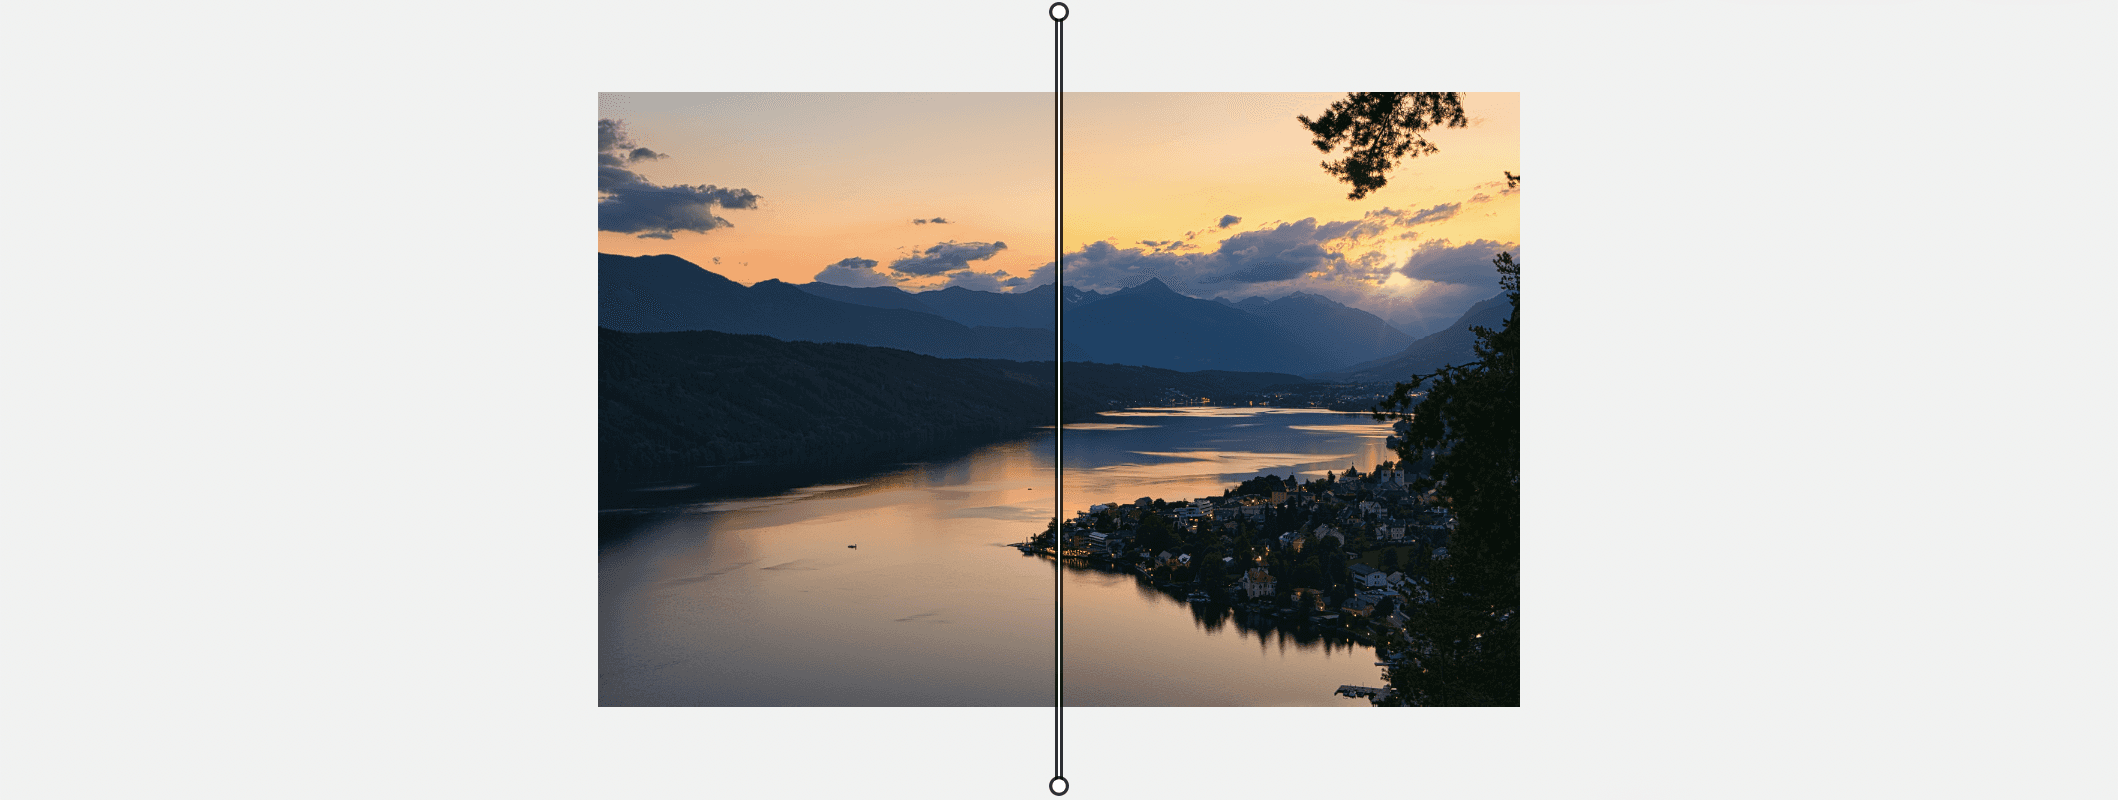
The split view draws the two images on top of each other at the same time. Adjust how much of each image is visible by moving the splitter control in the view. Drag either handle to move it along the screen edges, or drag the image(s) to move them along the splitter.
Find convenient default handle positions in the bottom toolbar and the View menu.
The Split view can be useful for comparing changes that affect every pixel of the image, such as image-wide levels and color adjustments.
Note: Combined with very high zoom levels, you can very clearly inspect precise pixel changes at the split line.
Difference
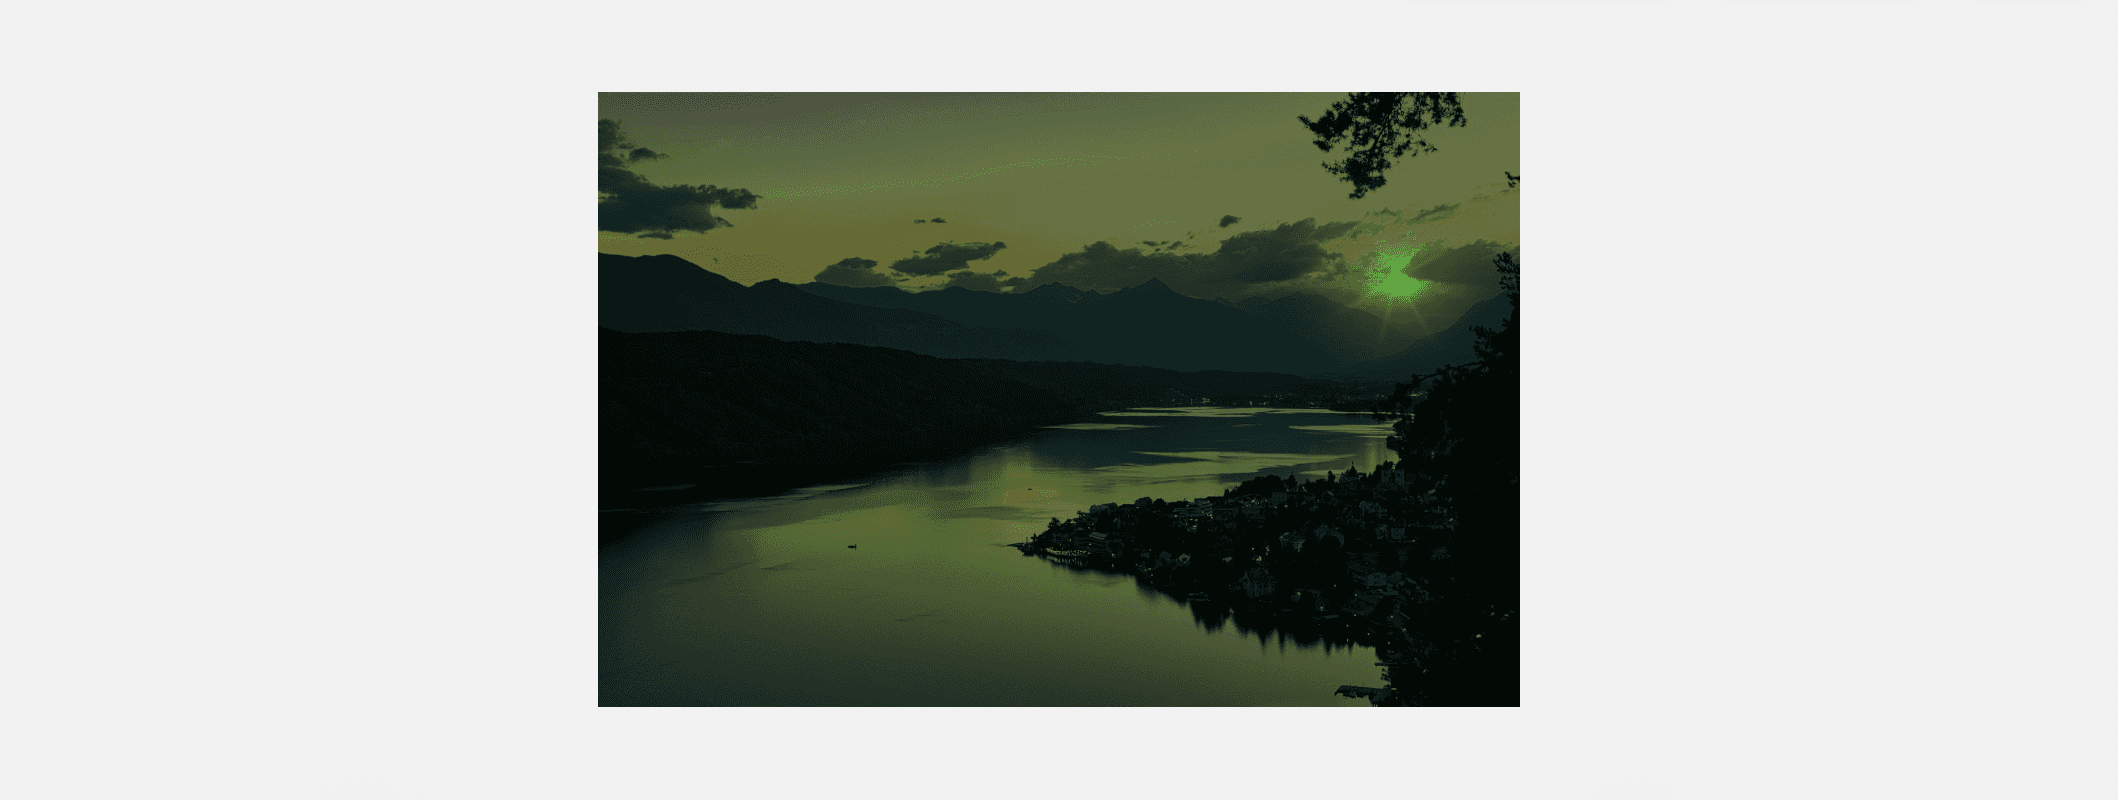
The difference view is a special One Up view that highlights which pixels have changed between A and B.
You choose either image A or B as the base image, using the A/B selector in the bottom toolbar or the respective menu command.
A mask is drawn over the image you are currently viewing, indicating the difference between the images. Adjust the opacity of the difference mask using the opacity slider in the toolbar (or menu commands).
You can control the mask itself using the Absolute/Proportional switch in the bottom toolbar (and the View > Difference Rendition submenu).
The difference mask colors as well as the rendering mode can be set in Image Settings.
Subtle pixel changes in images can be very hard to detect with the eye. The difference mask, when set to absolute, will find the smallest changes and highlight the pixels for you. Use this view to find changes that you can't see otherwise.
If you are looking to detect subtle pixel differences between images, use the Pixel Comparison.