
Image Comparison Tools
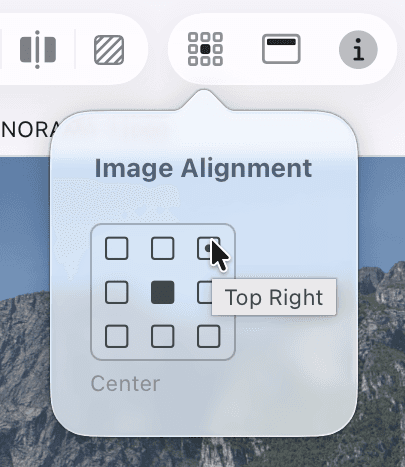
Image Alignment
When images have different dimensions, you can select how they should be aligned to each other. By default, they will be aligned using their center.
Use either the alignment toolbar item in the top toolbar or View > Image Alignment from the menu to adjust.
Common controls in the bottom toolbar
The zoom slider and zoom buttons
Zoom in and out of the image using the zoom slider. Or click the - or + buttons on either side of the slider to zoom in discrete steps. Next to the slider you see the current zoom level.
There are 3 zoom buttons to the right of the slider:
Adaptive Zoom Mode
This mode will automatically zoom to fit as you resize the window, but only up to actual pixels (100%).
Zoom to Fit Mode
Scales the images to fit so that they're fully visible.
Zoom to Actual Pixels
Scales the images to their original size once.
All of the options in the toolbar are also available as commands from the View menu.
Using the mouse and trackpad
You can move and zoom images using your mouse or trackpad.
If you are using an Apple Trackpad, make sure that Zoom in and out in the Scroll & Zoom section of System Settings > Trackpad is enabled.
Different mouse types offer various product-specific ways of scroll and zoom interactions.
Image Navigator
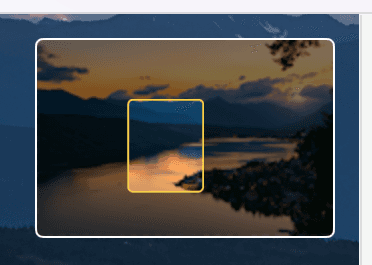
When you are zoomed into an image so that not all of the image is visible in the Kaleidoscope window, the Navigator will temporarily appear in the top-right corner of the view. The Navigator shows which part of the image you are currently viewing. That Navigator will automatically hide after a while, allowing you to focus on the entire content. Either move the mouse pointer into the Navigator area or interact via scrolling or zooming to show it again.
Inside the Navigator, you can move the visible (yellow) area by clicking anywhere in the Navigator or by dragging the highlighted area of the Navigator.
To globally turn the Navigator on or off, go to Kaleidoscope > Settings… > Images
Pixel Comparison
Pixel Comparison is a powerful tool for inspecting individual pixels in image comparisons.