
Image Compare Settings
To change aspects of comparing images, go to Kaleidoscope > Settings… > Images
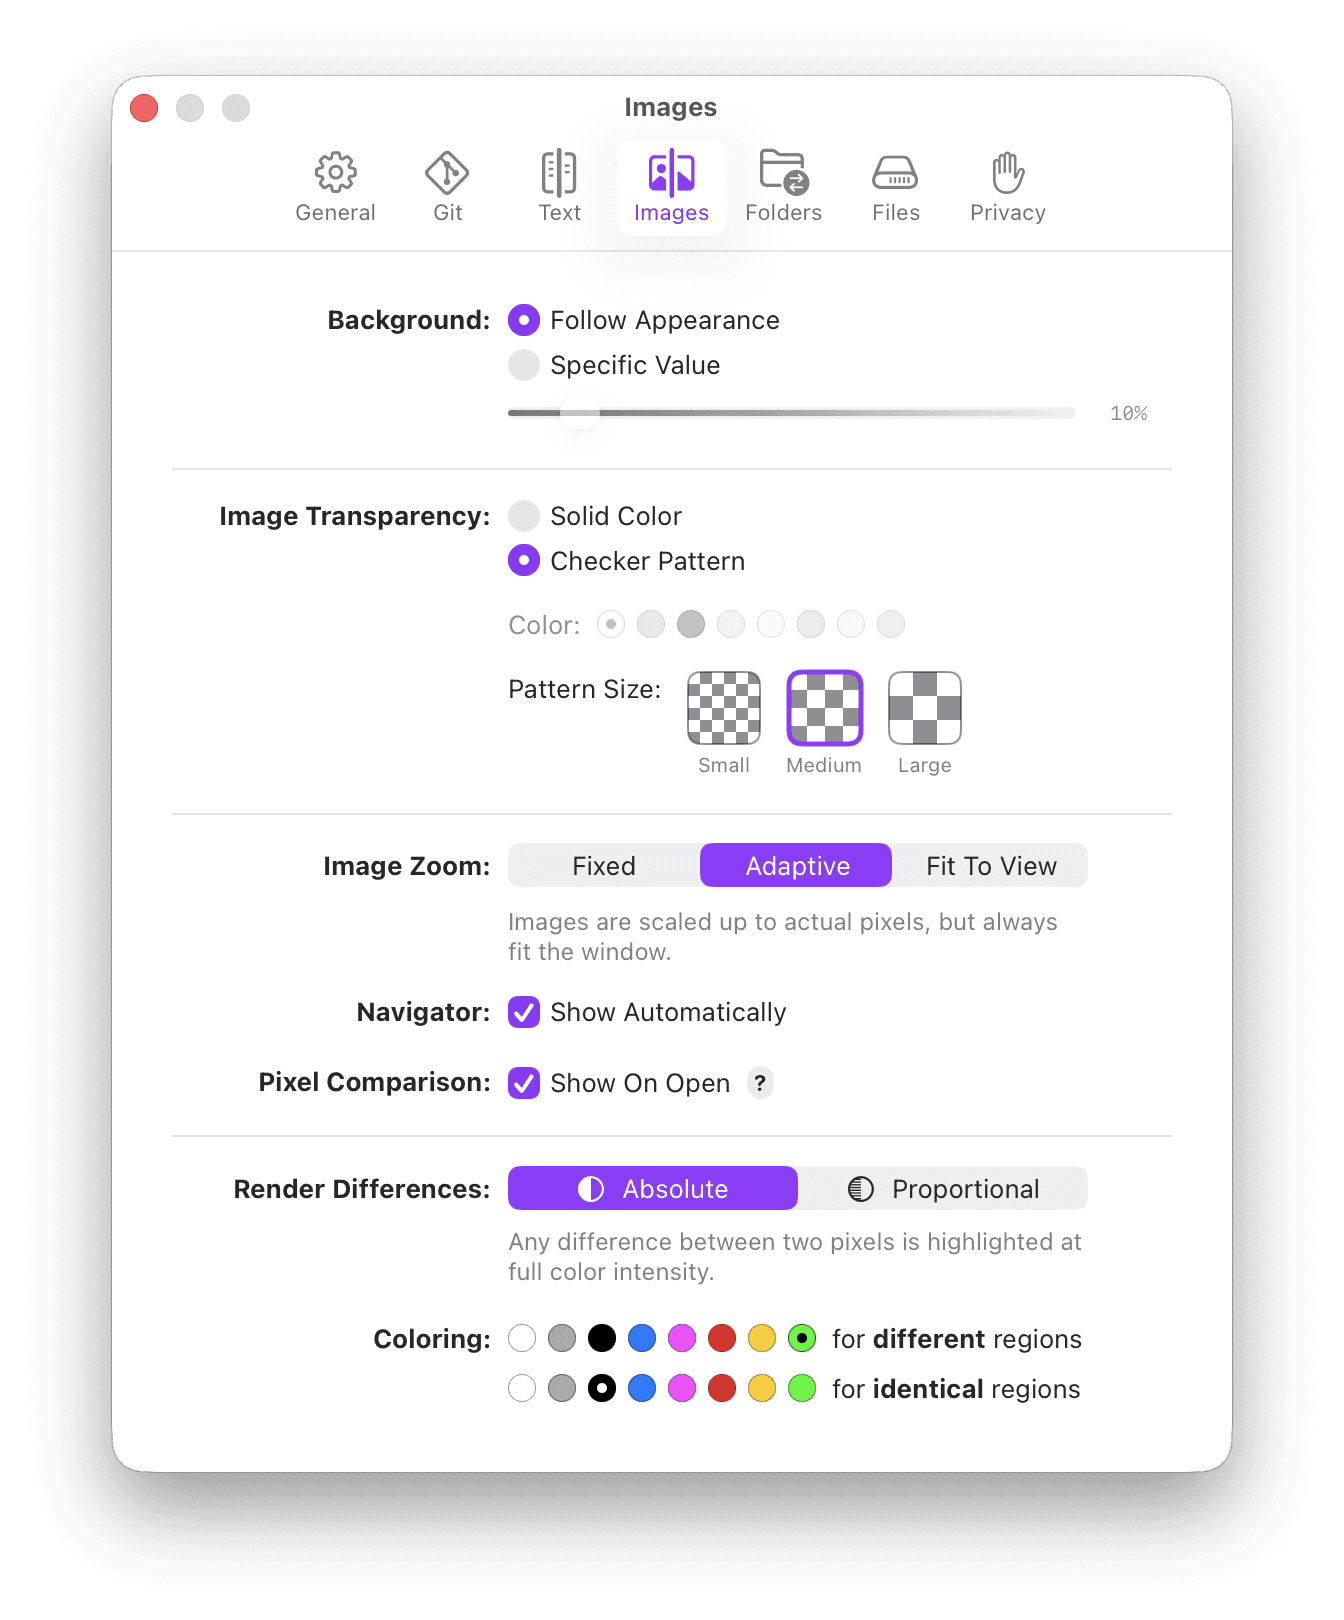
The following settings are available:
Background
The Background group controls how the background around your images looks.
The Follow Appearance option draws a lighter background in Light Appearance and a dark one for Dark Appearance.
Alternatively, you can opt to choose a Specific Value between black and white using a slider.
Image Transparency
The Transparency group defines how background in transparent areas within your image is being shown.
The default is to show transparency using a Checker Pattern. Alternatively, a Solid Color can be chosen.
Whether you can choose a Color for either Checker Pattern or the Solid Color depends on the Background option selected above. In case of Follow Appearance the color will be chosen to match your appearance.
If you selected Checker Pattern, you may also customized the Pattern Size.
Image Zoom
Image Zoom controls at what zoom level (magnification) images are initially shown. There are 3 options to choose from:
Fixed means that Kaleidoscope will let you zoom images to your liking. By default, images will be opened at actual pixel size, so you can see every single pixel at original size.
Adaptive will not magnify your images beyond actual pixels, but will scale them down if they are larger than the Kaleidoscope window can fit. This mode should work well with photos.
Fit to View is similar to Adaptive, but it will also scale up images beyond actual pixels to fill the available window. This mode may be useful for image assets.
Navigator
The Navigator is the small area in the top right showing you which part of the images you are currently seeing, in case the image is larger than the window. By default, the Navigator will be shown automatically when needed, but you can choose to turn it off here.
Pixel Comparison
The Pixel Comparison is a sidebar offering powerful tools to inspect image differences at the pixel level. Sample colors side by side, compare exact channel values, even across multiple color spaces and color formats like RGB, HSB, HSL and Lab.
When Show on Open is enabled, the Pixel Comparison will be shown automatically when opening a new Image Comparison. Please note that when image files are are located in a Git repository and showing the File History is enabled, that will take precedence over the Pixel Comparison.
Render Differences
The Render Differences group lets you define how changes between pixels in images should be shown in the Difference View.
There are two basic modes:
With absolute difference, any amount of change between a pixel in image A and B is shown at full intensity.
With proportional difference, the intensity of the highlight depends on the amount that a pixel has changed between A and B.
Coloring
Finally, Coloring lets you select colors for the regions highlighting of different and identical pixels. When shown at full overlay in the document, identical pixels between A and B will be drawn with the bottom color, different ones with the top color, with the intensity depending on your choice of absolute or proportional.